

Default language
This is the language for the importer frontend. CSVbox supports many languages, including English, German, French, Spanish, Hindi, Japanese, and Chinese (Simplified and Traditional). You can also view the translated texts for all supported languages and submit suggestions for changes. You can also set the language at runtime with thelanguage option when you initialize the importer.
Title and help text
Set a Title and Help Text for the upload page, separately for each language. The help text supports Markdown formatting for bold, italics, and links.Sample CSV template
Upload a sample file that users can download to see the format your importer expects. To give each user a different sample file, use thesample_template_url and sample_template_button_text options instead.
Split large files
Automatically split large CSV files into smaller parts for faster, more reliable imports with improved browser performance.
When it’s enabled, a CSV file that exceeds the Rows per Import limit is processed in parts, and each part reuses the same column mappings. When it’s disabled, the entire CSV file is processed as a single upload.
See Split Large CSV for the rows per import limit, user confirmation between parts, and how multipart imports appear on the Imports page.
File size limit
The maximum file size, in MB, that a user can upload.Custom validation message
Set a custom message in each language. The message supports Markdown formatting for bold, italics, and links.Allowed file types
Choose which file types users can upload: CSV, XLS, and XLSX. With AI Document Import, you can also accept PDF, DOCX, and image files (.jpg, .jpeg, .png) and extract tables from them using AI.
Page count limit
The maximum number of pages per import for AI document imports. Leave it blank for no limit.Skip tables
Skip tables from an AI import by row or column count, using Min Rows, Max Rows, Min Cols, and Max Cols. Leave any field blank to ignore that condition.Document metadata fields
Define which document metadata fields to capture on each import, across any supported file type (PDF, DOCX, images). Captured values are available ascsvbox.metadata in virtual columns, validation functions, and data transform functions. See Document Metadata Fields.
Show copy-paste data option
Show or hide the option that lets users paste data instead of uploading a file. Hide it when you want users to upload files only.Excel output type
Choose how numeric values from Excel files are imported:- Formatted: imports values as shown in Excel, such as
$1,200.00or15%. - Raw: strips the formatting and imports the core value, such as
1200or0.15.
Default delimiter
Set the default delimiter for manual data entry: Auto, Comma, Tab, Semicolon, Pipe, Space, Colon, or Equals Sign.Show file upload box
Enable or disable the ability to upload spreadsheet files. You may need to disable user file uploads and allow only copy-pasting of data in CSVbox. In that case, hide the File Upload Box and show users only the Copy-Paste data option. To hide the File Upload Box, go to sheet settings → Import Steps → File Upload and select No for the Show File Upload Box? option.Allow worksheet selection
Allow users to select a worksheet for upload. An uploaded Excel file can contain multiple worksheets. You can let users select which worksheet to upload. To activate worksheet selection, go to sheet settings → Import Steps → File Upload and select Yes for the Allow Worksheet Selection option. If Allow Worksheet Selection is set to No, the first worksheet is picked by default.Show import description
Allow users to provide a name or description of the file they’re uploading. File names likecontacts.csv or Import 123.xlsx lack context. More descriptive labels such as “Texas Customers” or “Parts from 2022 Catalog” improve the clarity and usefulness of the import. When enabled, the description input box appears after the user selects the file.
The description is pushed along with the row data to the destination, in the import_description property:
- API/Webhook
- Zapier
- Data at Client
- Import Complete Webhook
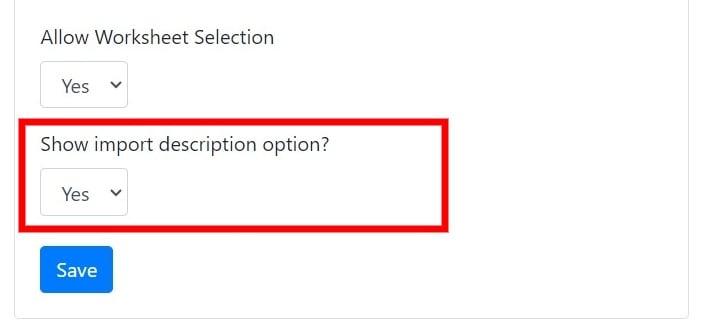
This feature is turned off by default. The description requires a minimum of 3 characters and a maximum of 100 characters.
Formatting in Excel files
Handle Excel file formatting for dates, times, and numbers. When importing data from Excel files, you may run into unexpected issues because of the way Excel internally stores and formats values, especially Dates, Times, and Numbers. Unlike CSV files, Excel files can retain formatting, formulas, and cell types, which can lead to inconsistencies or misinterpretation during import.To handle dates and numbers written in different regional styles in an uploaded file (for example, a day-first
04/05/2024 or a European 1.234,56), see Smart Date and Number Formats.Date formatting issues in Excel
Excel stores dates in one of two ways:- As formatted text: e.g.,
"03/04/2024" - As numeric serial values: e.g.,
45025, which represents the number of days since January 1, 1900.
"03/04/2024"might be March 4 in the U.S. (MM/DD/YYYY)- …or April 3 in Europe (DD/MM/YYYY)
45025) and the importer misinterprets the format, the final result could be completely off. To address this, CSVbox lets you explicitly define how Excel date values are interpreted.
Date handling options
- Default: Uses Excel’s built-in logic to interpret the cell as a date. Best for files with consistent formatting and locale.
- MM/DD/YYYY: Forces interpretation using the Month-Day-Year format. Example:
"03/04/2024"→ March 4, 2024 - DD/MM/YYYY: Forces interpretation using the Day-Month-Year format. Example:
"03/04/2024"→ April 3, 2024 - YYYY-MM-DD and YYYY/MM/DD: Force interpretation using the Year-Month-Day format.
- Custom: Define a custom format like
YYYY-MM-DD,DD-MMM-YYYY, or any other pattern based on how your Excel file stores the date. Example:"12-Mar-2024"→ use custom formatDD-MMM-YYYY
Time formatting issues in Excel
Excel stores time values either as:- Numeric fractions of a day (e.g.,
0.5represents 12:00 PM) - Formatted time strings (e.g.,
"14:30","2:30 PM","14:30:00")
0.75 might mean 6:00 PM (75% of a day), while "06:00" clearly means 6 AM but may be read as a string.
Time handling options
- Default: Uses Excel’s formatting as-is. Suitable for simple, clean files.
- HH:MM:SS: Example:
"14:30:00"→ 2:30 PM - HH:MM AM/PM: Example:
"2:30 PM"→ 14:30 - Custom: Define your own time pattern, such as
HH:mmorh:mm a, based on your file’s content.
Number formatting issues in Excel
Excel often applies formatting to numeric values that changes how they appear:- A raw value of
0.15could be displayed as15% - A value of
1200might appear as$1,200.00 - A long number like
1234567890123may be auto-converted to scientific notation (1.23E+12)
Number interpretation options
Date formatting is set per sheet, during file upload setup. Number formatting is set per column, for finer control.
How to configure date formatting
1
Open the File Upload tab
Go to Sheet Settings → Import Steps → File Upload tab in your CSVbox dashboard.
2
Find the Excel formatting section
Scroll to the Formatting in Excel Files section.
3
Choose a date format
Choose your preferred option for Date Format.
4
Save the configuration
Save the configuration.
Configure number formatting
1
Edit a Number column
Go to Sheet Settings → Columns and click Edit on a column with type Number.
2
Select a Values for Excel setting
Locate the Values for Excel option and select your preferred interpretation.
3
Save the configuration
Save the configuration.
Hide cancel button
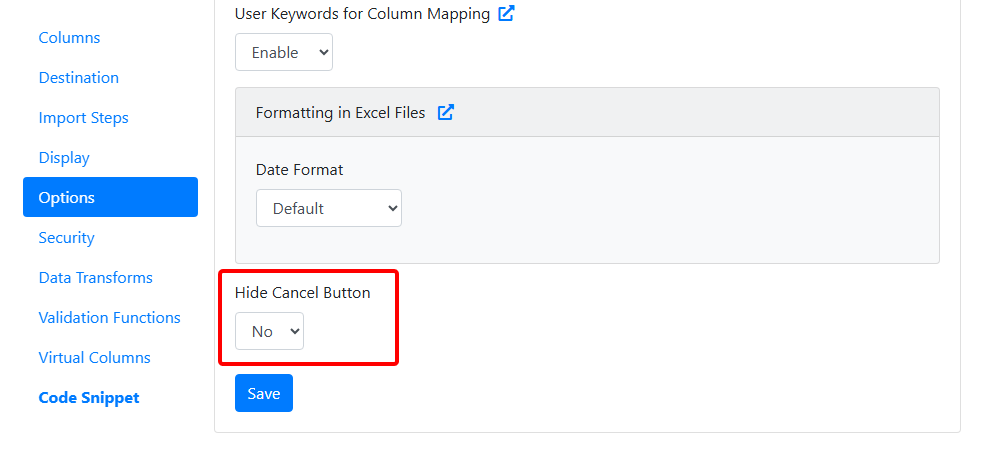
Hide the Cancel button located at the bottom-right corner of the importer. The X (close) button at the top-right corner of the importer remains unaffected. Enabling this feature helps prevent users from accidentally canceling the import process and keeps their attention on completing the import with the Submit button.- Use case: Ideal for workflows where you want to guide users toward submission without distractions or potential interruptions.
- Default value:
No
AI pre-import transform
Use AI to transform the uploaded file before it’s imported. Turn the option on and enter Transform Instructions in plain language. See AI Pre-Import Transform.Related settings
These features are also turned on from the File Upload step:- AI Document Import: extract structured tables from PDFs, images, and documents.
- Split Large CSV: split large files into smaller parts for faster, more reliable imports.
- AI Pre-Import Transform: restructure uploaded files before the column-mapping step.