

Demo app
See how it works here.Configuring your Bubble app
You need to be on a paid Bubble application plan to use the Bubble API, which is required to push external CSV data into the Bubble data store.
Data settings
Create or update a data type in your Bubble app where you want to push the CSV data. Make sure the data type is Publicly visible. Add custom fields to the data type as per your requirements.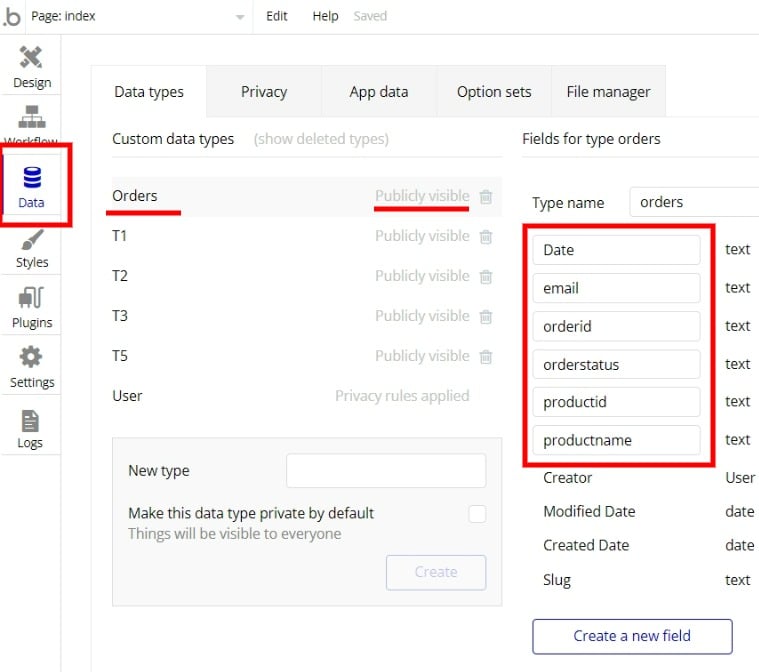

API settings
1
Open Settings
Go to Settings.
2
Open the API page
Go to the API page.
3
Activate the Data API
Activate Data API.
4
Activate the API for your data type
Activate the API for the data type where you want to push the CSV data.
5
Generate the API Private Key
Generate and save the API Private Key.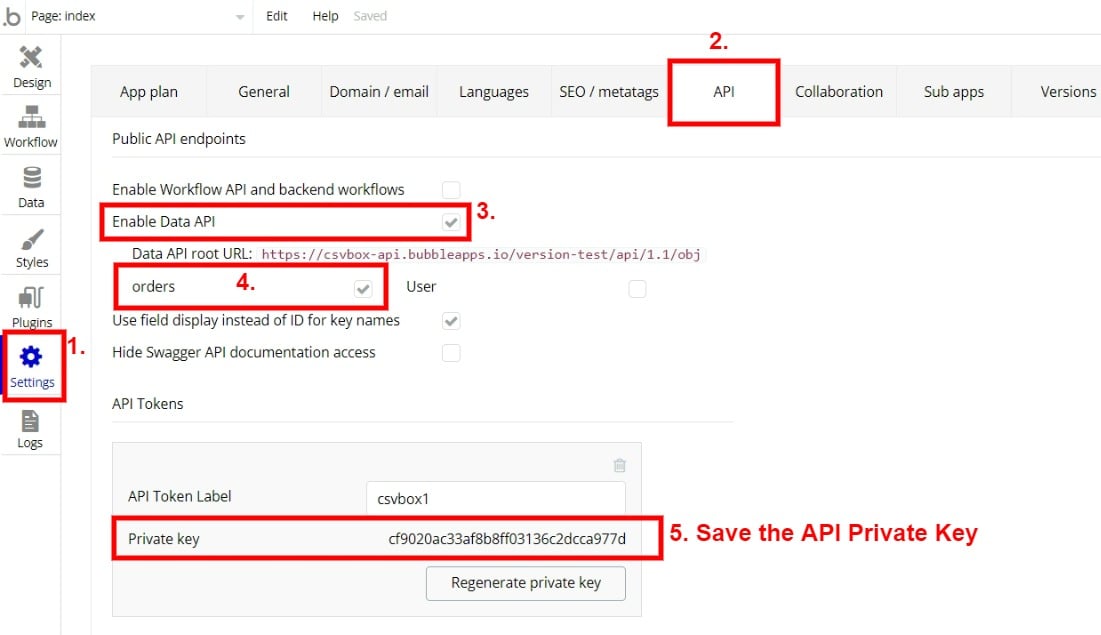
Setting up CSVbox
1
Log in to CSVbox
Log in to csvbox.io.
2
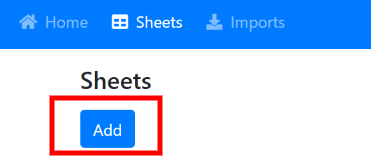
Add a sheet
3
Add columns
Add columns to the sheet. The column names should match the column/object names for your data type in Bubble. Pay attention to upper and lower case letters in Bubble and match them in CSVbox.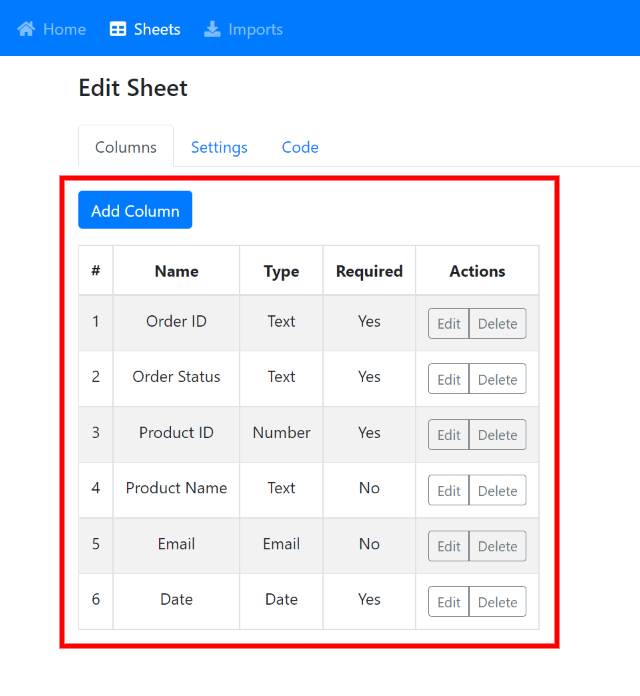
4
Select Bubble.io as the destination
Under the Settings section, for the Send Data To setting, select Bubble.io.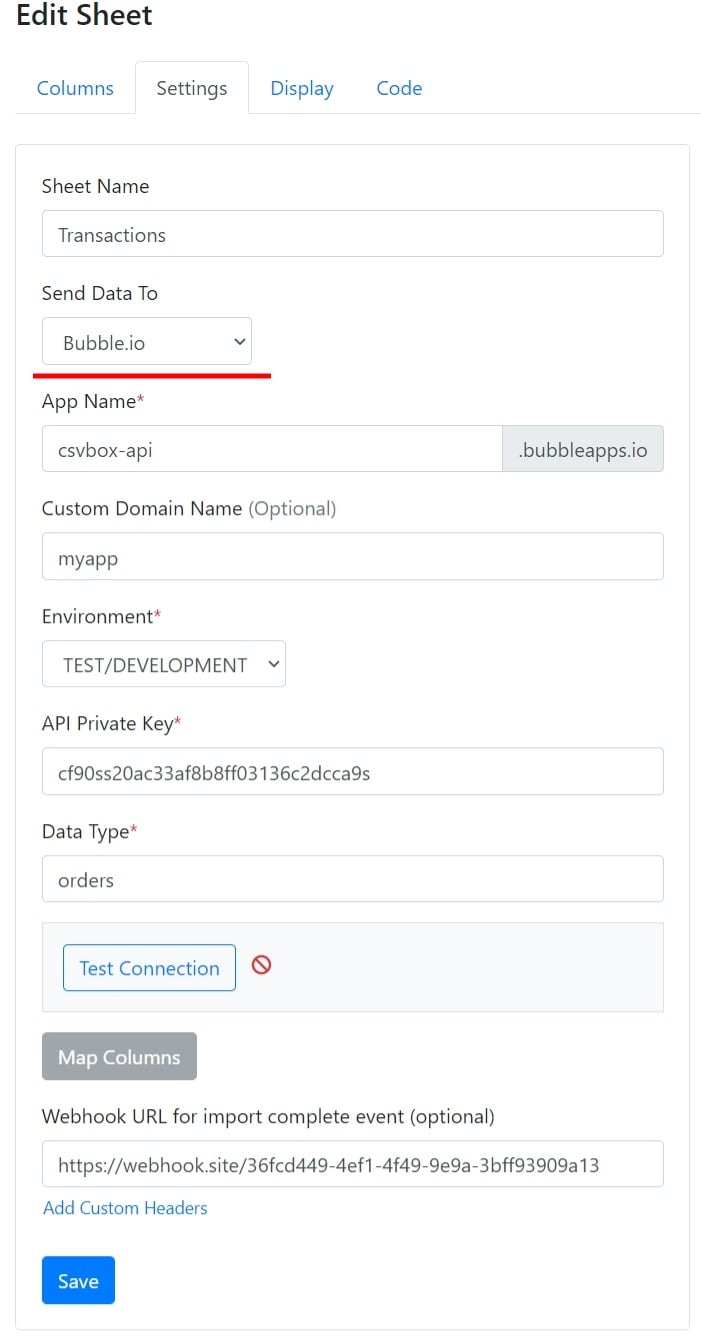
- App Name: the name of your Bubble.io app.
- Custom Domain Name: if you have attached a custom domain name to your Bubble app, provide it here.
- Environment: pick the environment where you want the CSV data to be sent, either TEST/DEVELOPMENT or PRODUCTION/LIVE.
- API Private Key: the API token you generated while configuring the API settings in the Bubble app.
- Data Type: the data type name where you want to push the CSV data.
5
Test the connection
Click Test Connection. It succeeds if all fields are filled in correctly.
6
Map columns
Click Map Columns. A modal opens where you can map the sheet columns to the object fields.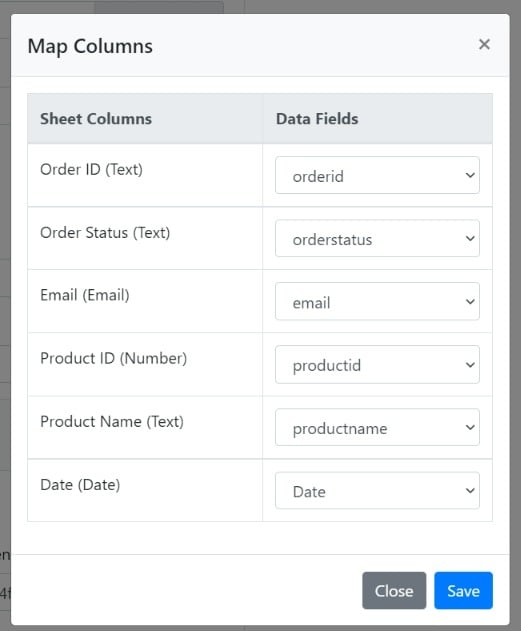
7
Save the sheet
Click Save.
8
Copy the Sheet License Key
Go to the Code section of the sheet and note down the Sheet License Key.
Adding CSVbox to Bubble
1
Install the plugin
Install the csvbox.io plugin in your Bubble app.
2
Add the CSVBox Button element
Drag the CSVBox Button element onto your web page.
3
Set the Sheet License Key
Paste the Sheet License Key value from the sheet Code page (saved above) into the Sheet License Key property of the CSVBox element.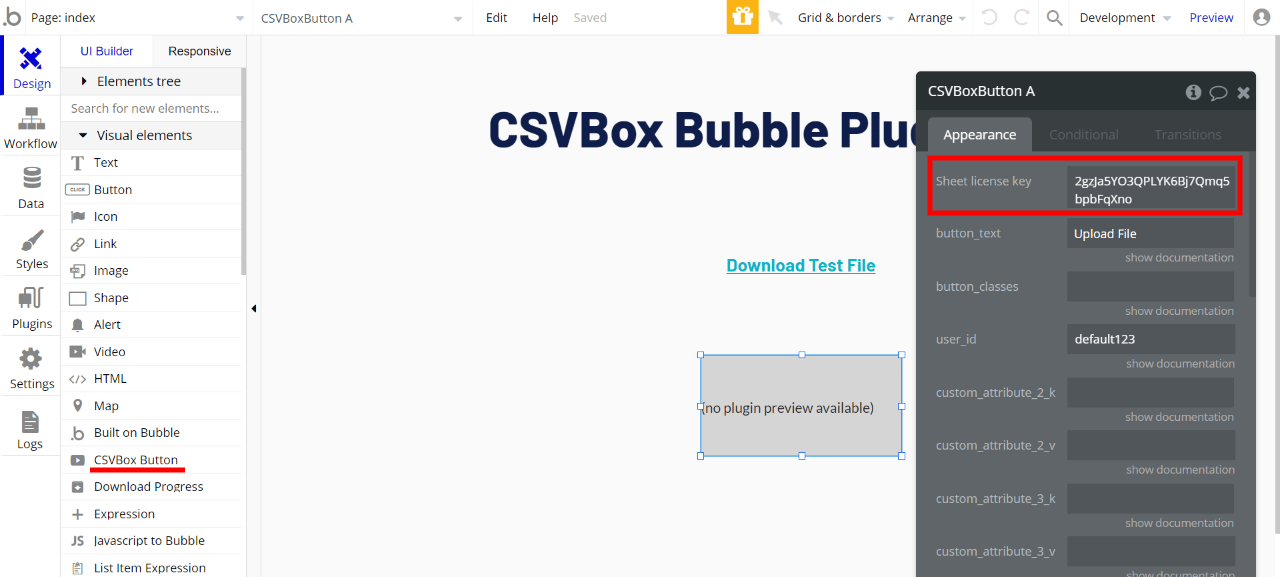
4
Configure the button
Enter the import button label in the
button_text property. Optionally, add CSS classes in the button_classes property to style the CSVbox import button.You can add custom user attributes (such as user_id, user name, company name, etc.) as values to the
custom_attribute_XX properties of the CSVBox Button element. More information on custom attributes is available here.Import events
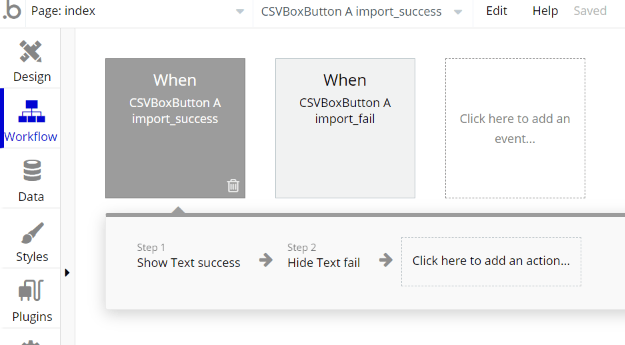
The CSVBox Button element exposes two events that indicate the completion of the import process:- import_success: triggered when the CSV data is imported successfully into your Bubble database.
- import_fail: triggered when the import fails completely or partially.
Why does my upload fail with unknown errors?
Bubble.io databases are very picky. The column names you POST from the CSVbox importer must exactly match what is in your Bubble.io database. Check the following:- Make sure there are no extra columns in your CSVbox sheet that do not map to a field/attribute in your Bubble.io database object. Bubble does not accept extra columns that its database doesn’t know about.
- The CSVbox sheet column names must exactly match the type names in your Bubble.io database object. Verify that capitalization and spaces are exactly the same as in your Bubble.io data type object.
- In your Bubble.io app settings, click API and make sure all checkboxes are checked for exposing the Data API, and for every database object you want to import into.
The maximum number of items that can be created in Bubble.io via a single bulk request is currently 1000.
Adding configuration options
Coming soon.