
Importer dialog size
Control the size of the import dialog box on large screens. Based on your import data structure (number of columns), pick between two import dialog sizes: Medium or Large. Go to sheet settings → Display → Importer Dialog Size.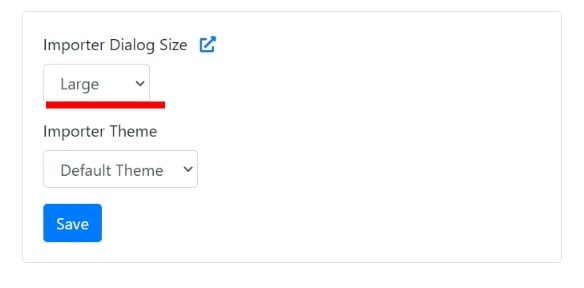
The dialog size configuration applies to large (desktop) screens only. On smaller screens, the dialog always occupies the entire screen.
Importer theme
Choose the theme of the importer: Light, Dark, Light Custom, or Dark Custom. You can also apply the theme at runtime with thetheme option in the installation code.
Logo
Upload your company logo to show in the importer for a fully branded experience. Provide a square logo. The best size is 30x30 px.Customize styling
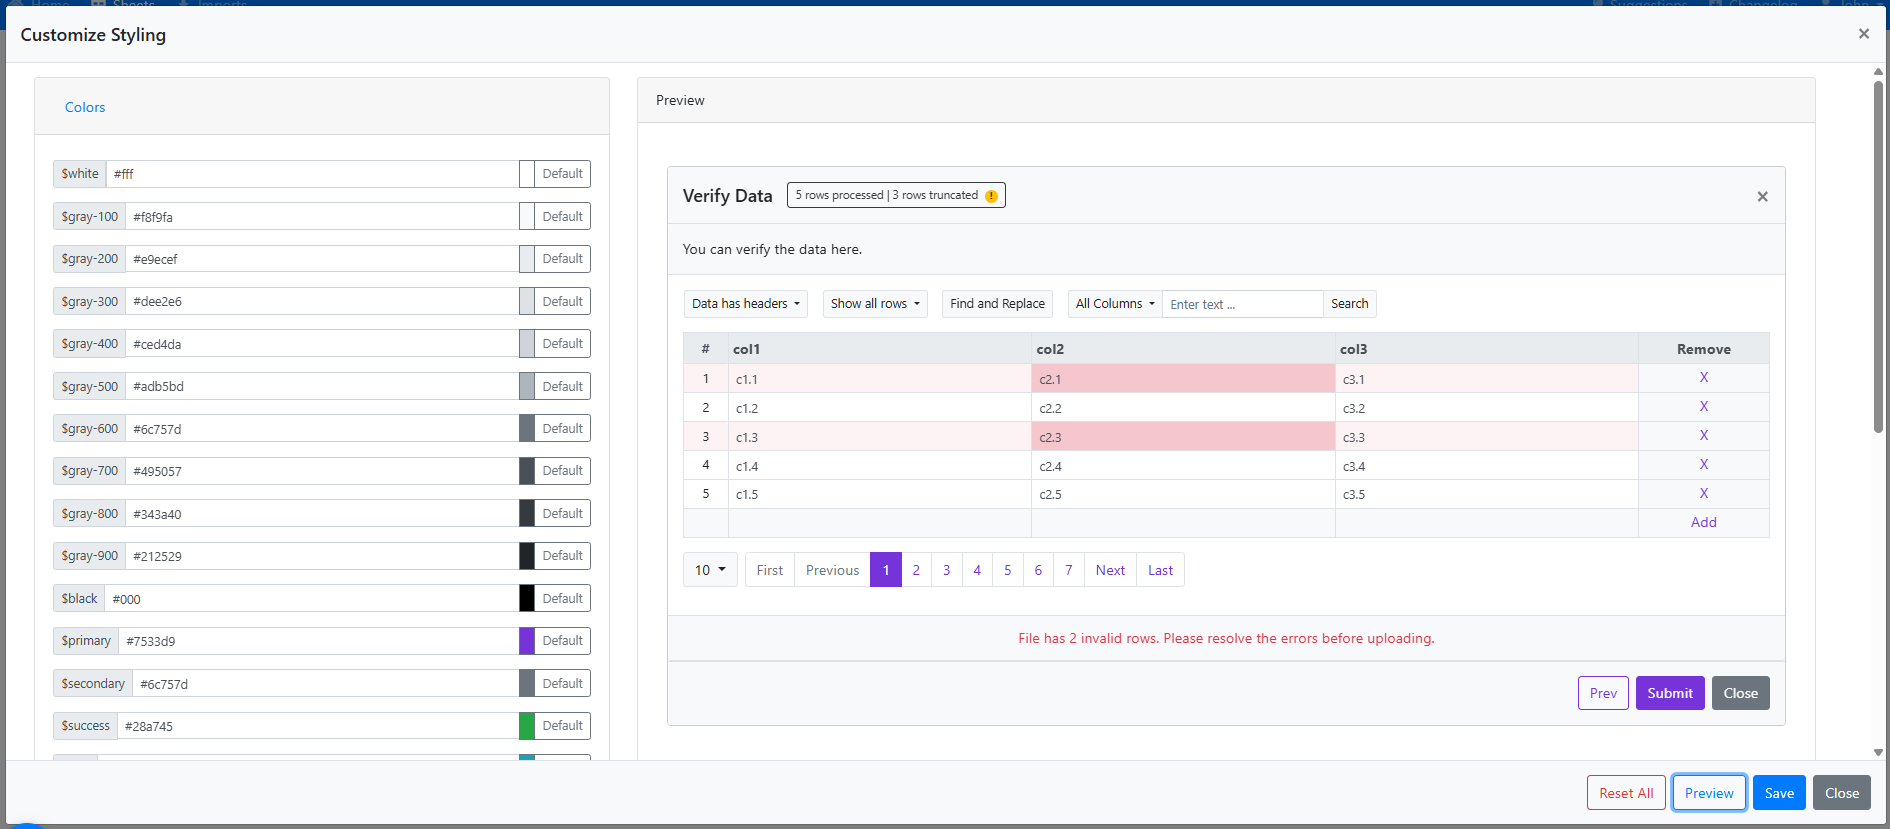
The Custom Theme option lets you personalize the appearance of the importer to match your brand. Adjust colors, fonts, and layout sizes to create a consistent, professional look.How it works
1
Enable the Custom Theme
Go to the importer sheet settings → Display tab and select the Custom Theme option under the Importer Theme label.
2
Adjust styling parameters
Use the left sidebar controls to modify colors, fonts, sizing, and other styling options.
3
Preview your changes
Click Preview to instantly see how your changes affect the importer’s appearance.
4
Save and apply
Once you’re satisfied with the customization, click Save to apply the theme.
Styling options
- Basic: Colors, Sizing, and Typography
- Advanced: Dropdowns, Pagination, and Modals
Custom Theme styling options are only available on the Pro plan and above.
Reset all fields
Reset every styling field to its default value.Download & reuse importer styling (CSS)
You can reuse the same importer styling across multiple sheets or projects. After customizing the look and feel of your importer, download the styling as a CSS file, then upload it to another importer to instantly apply the same design with no rework. This is especially useful when you want consistent branding across multiple imports or environments.Download the styling file
1
Customize your importer styling
Go to your importer’s Customize Styling section and adjust colors, borders, typography, and other visual settings as needed.
2
Download the styling file
Once you’re happy with the design, click Download CSS. CSVbox saves your current styling as a reusable
.css file.This file contains all the visual configurations you’ve applied to the importer.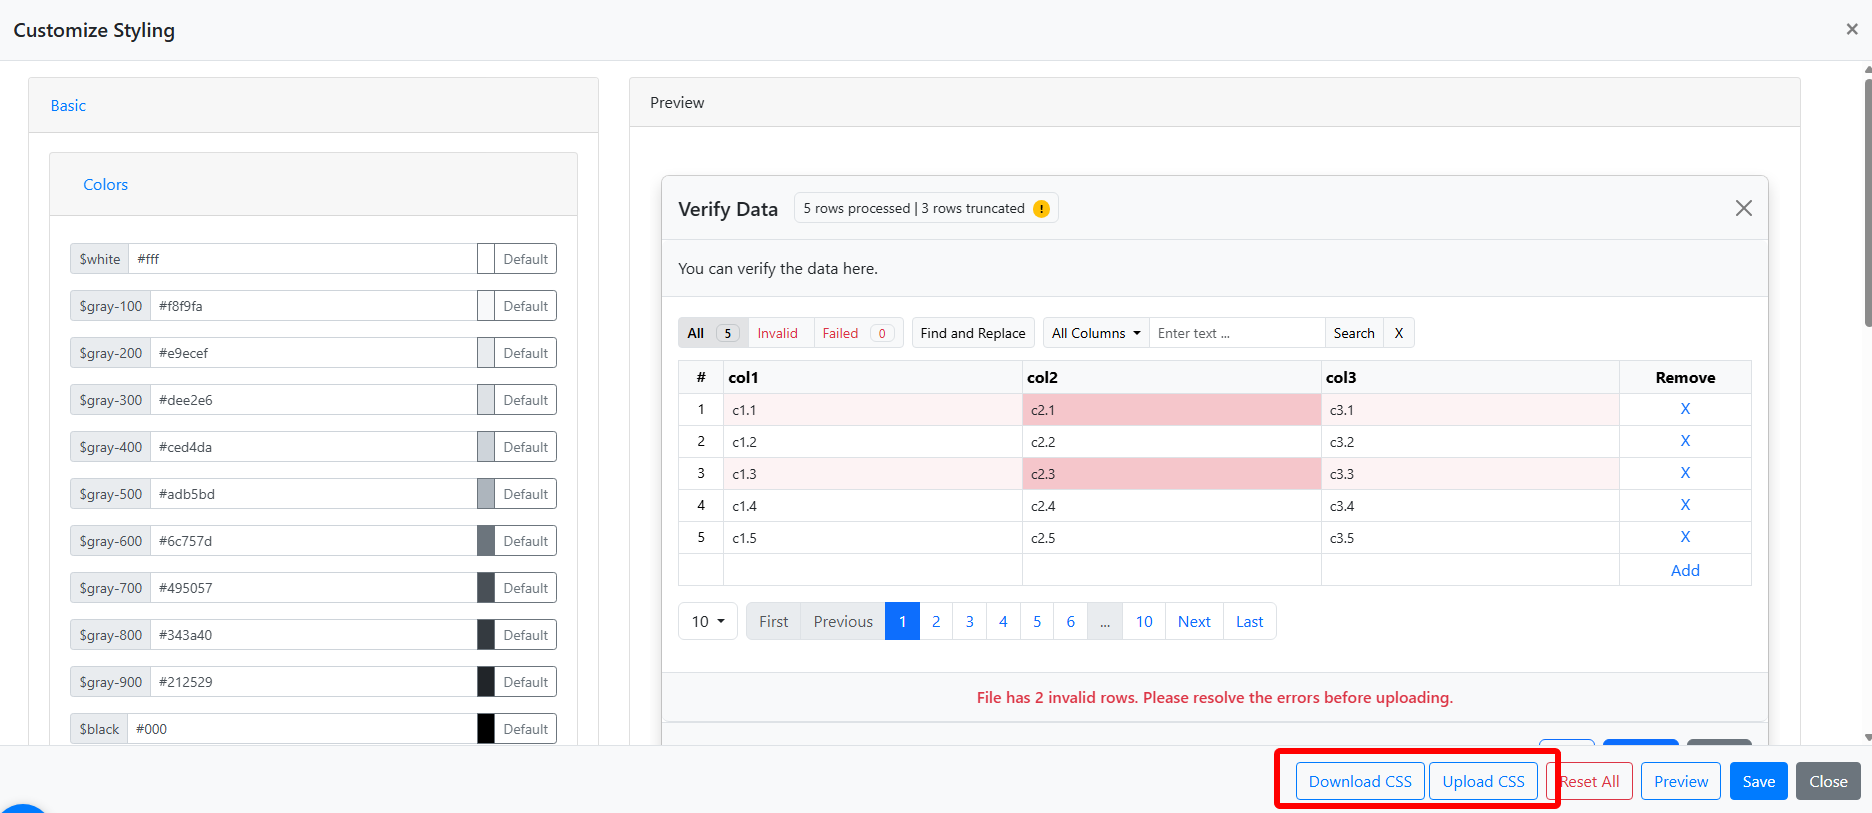
Reusing the styling on another importer
1
Upload the CSS file
To apply the same styling to another sheet or importer:
- Open the Customize Styling section of the new importer.
- Click Upload CSS.
- Select the previously downloaded CSS file.
2
Preview and save
Review the updated look in the preview, then click Save to persist the styling. Your importer now matches the original design.
Notes and best practices
- Uploading a CSS file overwrites the current styling of the importer.
- You can still make further adjustments after uploading.
- Always preview before saving to make sure everything looks correct.
- Keep a backup of your CSS files if you maintain multiple themes.
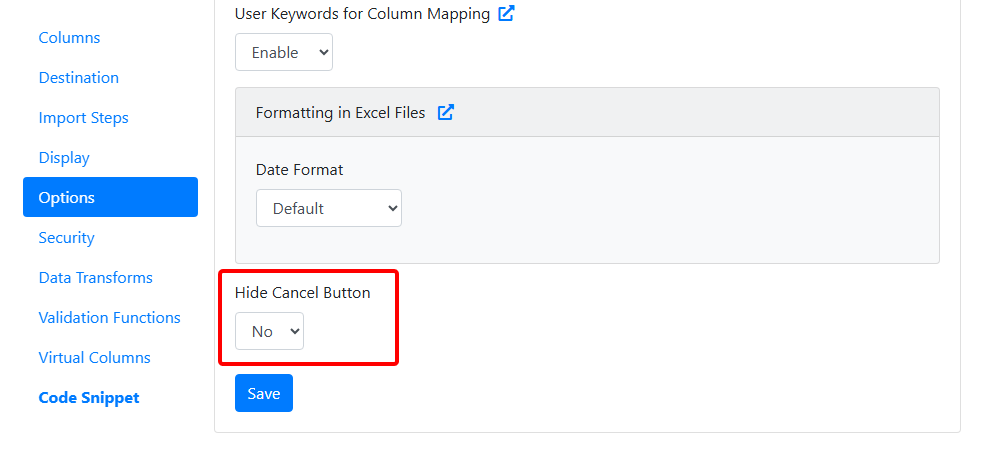
Hide cancel button
Hide the Cancel button at the bottom-right corner of the importer. The X (close) button at the top-right corner stays. Hiding Cancel helps prevent users from abandoning the import by accident and keeps them focused on the Submit button, which suits workflows where you want to guide users toward submission. Default:No